Thursday, January 31, 2008
wooden hearts

Stitched Wall Hanging
An idea is to stitch them at camp and then after camp,
finish making the wall hangings during mutual night.
Kool-Aid Jammers Bag
This is made with 12 Kool-Aid Jammers packages. They are machine zig-zagged together (4 on the front, 4 on the back and two on each side). The grosgrain ribbon is also zig-zagged onto the bag. This would be a fun pre-camp clinic--teaching the girls how to sew with a sewing machine.
binoculars

LOOK to the future and FOCUS on the consequences of your decisions...it is all up to YOU!
Tile Memo Board

mail box holder & pillows
Mail box holder
submitted by Leuri

Shadow boxes
Items needed: wooden boxes (purchased at Roberts) and various items to fill the boxes.
wooden flowers
Flower, leaves and bow were cut our of wood. The stem is a dowl. A block of wood with a whole in it is inside the terracotta pot. These are fun to paint and decorate.
rag flip flops
This is an easy and fun project. Just a reminder--there are no flip flops allowed at Mia Shalom. So, this might be a fun project for them while they are waiting for the buses to arrive.
Covered Composition books
Canvas Bags
These were a lot of fun to make. Canvas bags were purchased at Walmart. The accessories were purchased at Walmart, Roberts, and Michaels. This was a lot of fun to see the girls personalities come out while decorating their bags. We used tacky glue to glue on these accessories.
Tin Card Can
Sunday, January 27, 2008
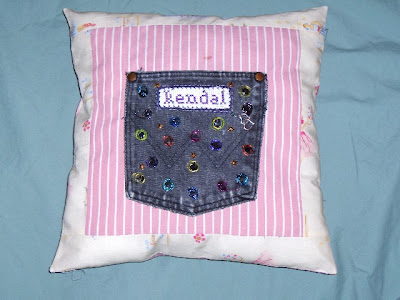
hand-stitched pillows
vinyl lettering on glass blocks

It is amazing of all the possibilities that you can use with vinyl lettering.
magnetic board
vinyl lettering on wood
framed glass

Paint your frame
Vinyl lettering on tiles
Mod Podge Blocks

Sponge the modge podge on the 5 sides of the blocks, place the pictures on 5 of the sides.
Then, mod podge the 6th side and place scrapbook paper over the top of that side. Let dry.
Mod Podge over the 5 sides. Let dry.
Mod Podge the 6th side, attach each letter on each block and mod podge over the top of the letters. Let dry.
I like to add one more layer of mod podge on all sides again.
crocheted & knitted hot pads
beaded ribbon bookmark
Bucket of Pens
Cut your flower stem--leaving about 2 inches of stem. Take your pen and remove the top off the pen. Using the florist tape we are going to bind the pen. Florist tape sticks to itself when stretched so as you roll the pen you need to pull the tape tight as you wind, make sure you do not leave any gaps or the pen will show through. You can unwind this and try it again until you get it nice and flat. It's a little tricky but easy when you know how so have a few goes until you are happy with the result. When you are near the top, place the stem of the flower next the pen and finish binding the pen. If you have leafs you can ad them as you are binding.


